 Docs
DocsUsing the Adobe Commerce admin panel
Learn how to use the Adobe Commerce admin panel to configure the Payske module for the Adobe Commerce platform.
Issuing refunds
- Go to Sales > Orders to find the order you want to refund.
- If you set Payment Action to Authorize Only, the only action you need to take is to press the Cancel button at the top of the page. However, if you chose to Authorize and Capture, proceed to the next step.
- From the left sidebar, click Invoices, then click on the invoice to refund it.
- At the top right-hand corner, click Credit Memo.
- Adjust the amount (if necessary) and click Refund at the bottom of the page to perform a live refund. By clicking Refund Offline, you only issue the refund in Adobe Commerce and not in Payske.
- For a partial refund, you can adjust the Adjustment Fee. This is the amount you don’t want to refund. In the screenshot above, by setting the adjustment fee to 10 USD, we’re refunding 53.87 USD and 10 USD is kept as a fee. You can ignore the Adjustment Refund field because we won’t refund an amount that is greater than the original payment of the customer. The amount is now fully or partially refunded in Payske and a note appears in the Comments History of the order.
Authorizing card payments and capturing later
In your card settings, you can set Payment Action to only authorize card payments when placing an order. The bank guarantees the amount and holds it on the customer’s card for up to 7 days. Failure to capture the payment by this time cancels the authorization and releases the funds.
Optionally, you can set Expired Authorizations to attempt to re-authorize the payment in case you miss the 7-day window but it isn’t guaranteed to succeed.
When ready to capture (for example, you shipped the product), follow these steps:
- Go to Sales > Orders.
- Find the relevant order.
- Click Invoice.
- If you need to issue a partial invoice, adjust the invoice items as shown in the video below. You can reduce the item quantity but not increase it.
- Click Submit Invoice to capture and finalize the payment. After clicking Submit Invoice, you can see the captured funds in the Payske Dashboard.
Creating orders
You can create an order and charge a customer’s card with details that you’ve received over the phone, directly from the Adobe Commerce admin panel:
- Go to Sales > Orders.
- At the top right hand side, click Create New Order.
- Choose a customer, the store, and any products for that order.
- Select a shipping method (if applicable) before filling in payment details.
- When you’re ready to submit the order, select a saved payment method. Clicking the Add new button redirects you to the customer page in Payske, where you can securely enter a new payment method.
- Click Submit Order.
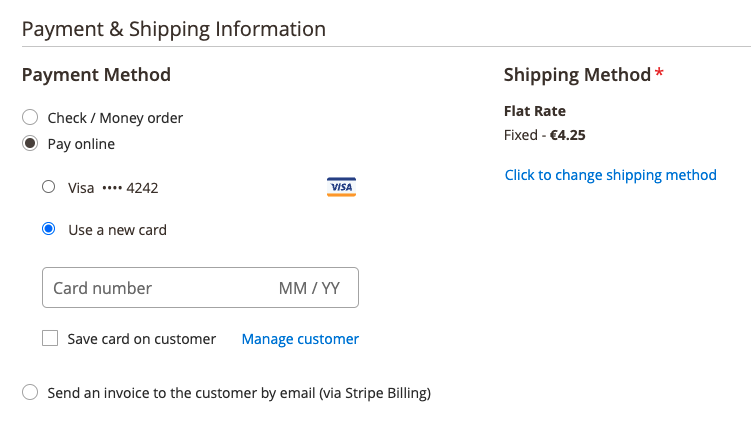
Payment information for admin orders
If you set Payment Action to authorize and capture, we charge the card immediately. If you set Payment Action to authorize only, you must also capture the payment.
Send an invoice to the customer
When creating a new order from your Adobe Commerce admin, you have the option to send an invoice link to the customer by email:
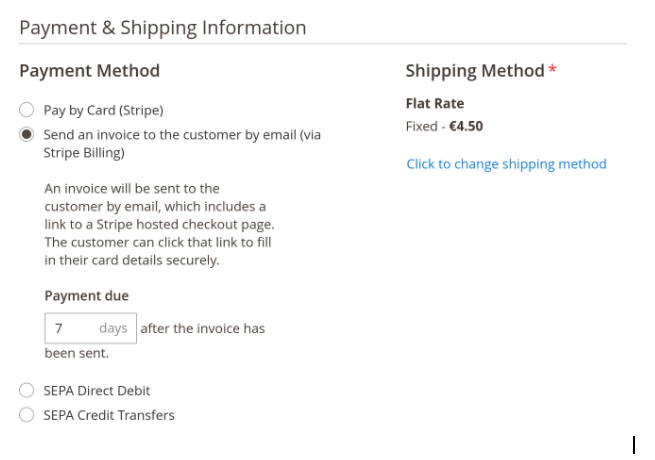
Send an invoice to the customer
You can change the due date to help keeping track of late payments in your Payske Dashboard.
Using this method is more secure than paying by card from the Admin Panel as you avoid collecting sensitive payment information over the phone. By opening the link in the email, the customer opens a Hosted Invoice Page which includes a payment form.